Potting, Mixing and Dispensing Machines for PU Resins, Epoxy, Silicone – Twin Engineers

5 mistakes to Avoid in Vacuum Potting

In view of expanding to global electronics markets, the team at a leading Indian manufacturer was gearing up for a significant project: producing a series of high-reliability components for a new line of  precise metering products. The stakes were high, and so was the pressure. They knew that even a small mistake or manufacturing error in the vacuum potting process could lead to severe failures in the field.

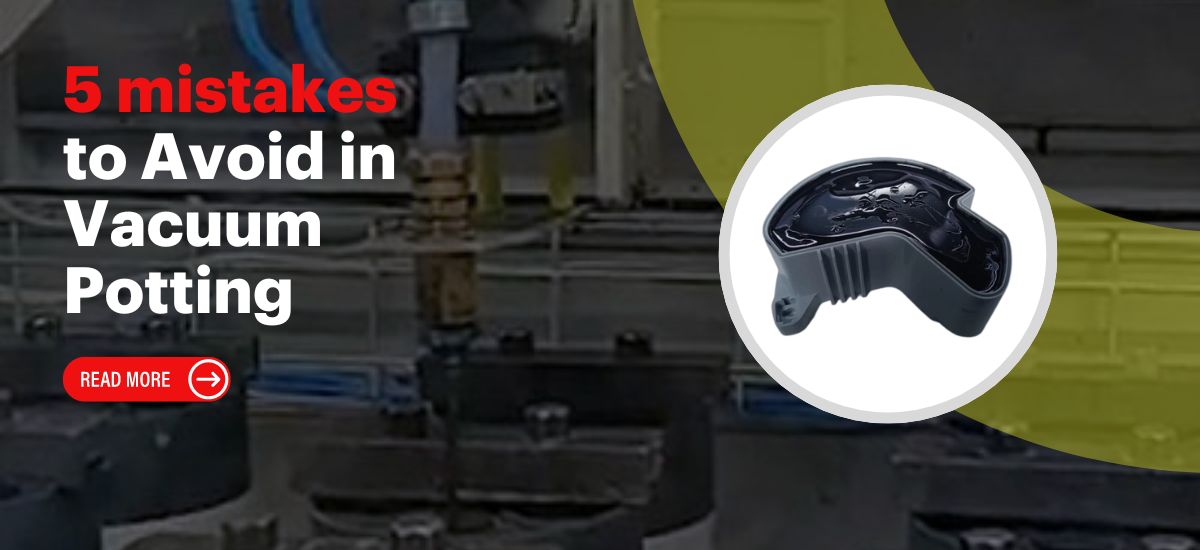
Vacuum potting is a specialized technique to achieve the highest quality and reliability in potted electronic assemblies. Normally, vacuum potting is done for the high voltage applications. However, given that electronic circuits are now getting smaller and smaller, so is the space available for potting compounds to enter the components. For over 30 years, Twin has gained immense expertise in handling a variety of vacuum potting applications. Learning from this experience, we have identified 5 common mistakes that many customers tend to overlook in vacuum potting.

This was known to the Indian manufacturer mentioned above, and thus, they approached Twin to proactively to resolve their challenges in vacuum potting.

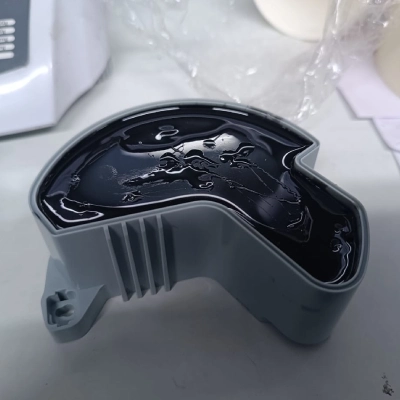
1. Avoid the smallest air bubbles. Make small changes in the design. 

Having the PCB circuits in the casing that do not allow for proper material flow and air escape in potting can lead to incomplete filling and air entrapment. Twin guided the client’s team to check the possibility of adding a runner and a riser for the electronic meters. The component design team had focused on the ease of assembly. But since the potting is at the end of the line, the risk of bubbles arising in potted assemblies was ignored. Design changes with appropriate venting channels to facilitate the escape of air and ensure even distribution of the potting material were necessary. Ensure that your design allows for a smooth flow of the material to reach all parts of the assembly. 
As Tech solutions worked with Twin from the design phase, this problem was addressed well before the mass production stage. Imagine, you face this challenge after the prototype is built!

2. Insufficient Vacuum Level Rapid Vacuum Release

With so much experience, we suggest that achieving the right vacuum level is very crucial. Not achieving a sufficient vacuum level can result in trapped air bubbles within the potting material, leading to voids and weak spots. Ensure the vacuum pump is capable of reaching the necessary vacuum level (usually below 10 torr). Regularly check and maintain the vacuum equipment to prevent leaks and ensure optimal performance.
Releasing the vacuum too quickly after potting can cause air to be sucked back into the material, forming bubbles and frothing. Gradually release the vacuum pressure to allow the potting material to settle properly without introducing new air pockets. Use a controlled venting process to slowly equalize the pressure.

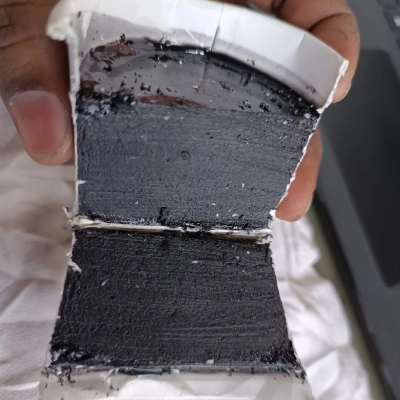
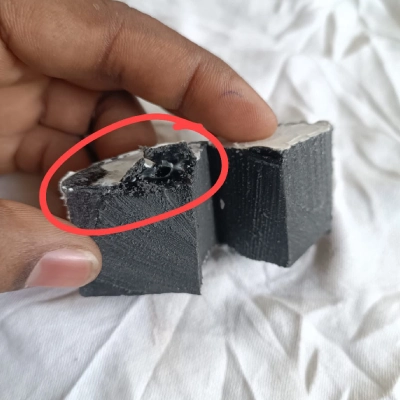
3. Inadequate Material Degassing

Not degassing the potting material before application can result in residual air being trapped within the material, which can later expand under vacuum and create bubbles.
Thoroughly degas the potting material by placing it under vacuum for a sufficient period before use. This process removes any entrapped air and ensures a more uniform and bubble-free application.

4. Dispensing overflow

Quantities of dispensing need to be accurately controlled else there are chances that material will overflow. Multistage potting with multi axis robot dispensing is the best suitable option when you have intricate circuits. Dispensing flow has to be a variable flow dispensing machine. Choosing a machine parameter in this case plays vital role. 

5. Ignoring Atmospheric Conditions

Humidity plays a very important part in the potting process. That is ignored in most of the cases. And that creates sticky ness to the potted compound or bubble entrapment in the middle of the potting. Temperature fluctuations during the vacuum potting process can affect the viscosity of the potting material and its curing time, leading to inconsistent results. Severe temperature differences may also cause cracks. 
Controlled environment with dehumidifer in case of higher humid atmospheric conditions, Maintain a consistent temperature throughout the potting process. Use a controlled environment to manage the temperature of both the potting material and the components being potted. Ensure the curing process occurs within the recommended temperature range for the material used.

6. Pre and Post Process Checks

Always check the material storage area. Also, the containers should be air tight. Addition to this, preheating temperatures of the potting material is to be checked twice. Temperature of the material. Preheating of the potting compound and also the heating temperature of the material in case the component can be preheated. Handling of the components after preheating and dispensing. 
Curing conditions are a critical parameter and the atmosphere is better if controlled. 

Additional Tips

Training and Documentation

Ensure all personnel involved in the vacuum potting process are adequately trained and that detailed documentation of the process is maintained for consistency and quality control.

Regular Maintenance

Keep vacuum potting equipment well-maintained to avoid unexpected failures and ensure consistent performance.

Choose your machine with our Expert

Sanchita Bhalwankar
Expert in Potting Processes